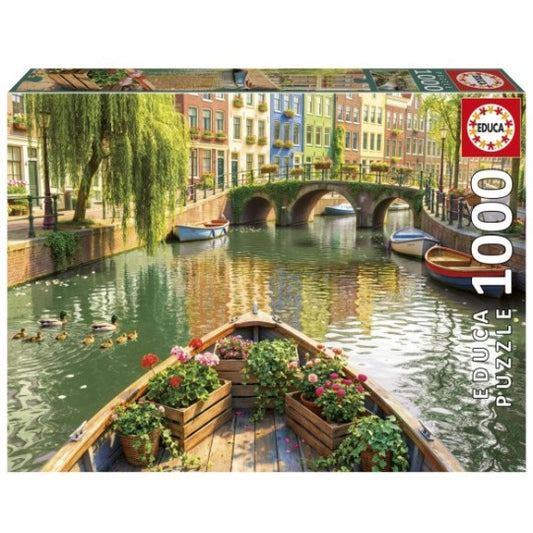
Finishing a puzzle brings a very special kind of satisfaction. After hours, or even days, of fitting pieces together, it makes perfect sense to want to preserve the result and turn it into a decorative object. Gluing it is the most practical way to keep it in one piece, frame it safely and make sure a simple touch does not undo all your work.
The good news is that the process is very straightforward. With the right materials, a little patience and a stable work surface, you can glue a puzzle at home with a clean, durable and visually polished finish.
Why it is worth gluing a finished puzzle
Gluing a puzzle is not just about hanging it on the wall. It also helps protect the image, gives the whole piece rigidity and makes it easier to move later on. A large puzzle without any fixing is always fragile. Lifting it slightly the wrong way is enough to create gaps between pieces or, in the worst case, lose part of your work.
There is also an aesthetic reason. When the glue is applied well, the puzzle takes on a uniform, stable look. The surface becomes more cohesive, with less risk of loose pieces at the edges, and framing becomes much simpler.
In some cases, gluing the puzzle is also a way to extend the experience. Instead of being stored in a box, it takes a visible place in your home, office or study space.
Materials to glue a puzzle without damaging it
Before you start, it is worth gathering everything you will need. This avoids interruptions halfway through and reduces the risk of handling the puzzle too much while the glue is still wet.
The materials may vary depending on the method you choose, but the essentials are simple:
- Puzzle glue
- Plastic spatula or stiff card
- Parchment paper or wax paper
- Thick cardboard or a rigid board
- Clean, dry cloth
- Wide adhesive tape
- Ruler
- Frame or backing board, if applicable
If you do not have specific puzzle glue, choose a clear adhesive that dries cleanly and is not too wet. Not every glue works. Products that are too runny can warp the cardboard and leave visible ripples, especially on larger puzzles.
Preparing the puzzle before applying glue
Good preparation prevents almost all common problems. The puzzle must be complete, of course, but also properly fitted together. Run your hands very lightly over the surface to check that no pieces are raised or poorly fitted.
Next, make sure the puzzle is on a base that lets you work comfortably. If you built it directly on a table, the best approach is to slide it carefully onto a stiff piece of cardboard or a thin board. Place parchment paper underneath to stop the glue from sticking to your work surface.
If you need to flip the puzzle, the safest method is to make a “sandwich” with two boards. Place one underneath and one on top, hold them firmly and flip the whole thing in a single firm, controlled movement.
At this stage, check four points:
- Surface: flat, clean and stable
- Pieces: all well joined and aligned
- Workspace: no drafts and no excessive humidity
- Protection underneath: parchment paper or a non-stick material below
Step by step: gluing a puzzle from the front
Gluing the puzzle from the front is the most common method. It is simple and effective and, when done with clear glue, it barely changes the look of the image. The secret lies in using the right amount of product and in how you spread it.
Start by placing a small amount of glue in the center of the puzzle. There is no need to overdo it. The idea is to spread the product from the inside out, covering the whole image with a thin, even layer. Use a plastic spatula, a stiff card or the applicator included in the package, if there is one.
Spread the glue with long, gentle strokes. Make sure it seeps slightly into the joints between the pieces, because that is what will hold everything together. At the same time, avoid buildup. If there is excess, remove it right away with the spatula and spread it onto areas with less coverage.
Work more carefully at the edges. The edges tend to lift more easily and are also where application mistakes show the most. A thin, even film is usually enough.
Then let it dry without touching it. Drying time varies from product to product, but it is normal for initial drying to take a few hours and for a more secure hold to set in after 12 to 24 hours. The best guide is still the one given by the glue manufacturer.
Liquid glue, spray glue and adhesive sheets for puzzles
Not every solution works the same way. The choice depends on the size of the puzzle, the finish you want and how rigid you want it to be.
The following table helps compare the most common options:
| Method | Advantages | Limitations | Best use |
|---|---|---|---|
| Liquid puzzle glue | Strong hold, clear finish, easy to find | Needs careful application to avoid leaving excess | Medium and large puzzles for framing |
| Spray glue | Quick, even application | Requires ventilation and more control over the environment | Those looking for speed and convenience |
| Adhesive sheets on the back | Clean process, no shine on the front | Less protection for the image surface | Decorative puzzles that are already well set |
| Diluted white glue, with caution | Budget-friendly solution | Higher risk of moisture and warping | Only as an alternative and after a test |
If you want a cleaner visual result, dedicated puzzle glue is still the safest option. It is designed for this type of cardboard, dries clear and tends to offer consistent adhesion without compromising the image.
How to glue a puzzle from the back for extra stability
Gluing from the front solves a lot, but gluing from the back can add extra stability, especially for large puzzles or when you want to mount your work on a rigid base. There are two common ways to do this: with glue on the back or with special adhesive sheets.
To apply glue to the back, the puzzle needs to be flipped safely. Then you can spread a thin layer on thick card, a foam board or a rigid backing and lay the puzzle on top. Another option is to apply the glue directly to the back of the puzzle, as long as it is spread evenly.
Adhesive sheets simplify this process. You cut them to size, peel off the protective films and apply them to the back with steady pressure. It is a practical solution if you want to avoid shine on the front or do not want to risk altering the image.
When the puzzle will be hung without a frame, this technique is even more valuable. Gluing the back to a rigid base turns a set of pieces into a decorative panel that is much easier to handle.
Common mistakes when gluing a puzzle
Most problems are not caused by a lack of materials, but by rushing. A well-built puzzle deserves a finish to match, and that calls for a few minutes of extra attention.
These are the most frequent mistakes:
- Too much glue: creates stains, uneven shine and very long drying times
- Too little glue: leaves loose areas and pieces that come apart easily
- Unstable base: causes shifting and misalignment during application
- Rushed drying: handling the puzzle too soon can open cracks that are invisible at first glance
- Unsuitable product: some glues leave the cardboard soft, wavy or yellowed
It is also common to forget the protection underneath. If the glue seeps through small gaps between the pieces and the puzzle is directly on the table, it can end up stuck to your work surface. It is a simple mistake, but a very unpleasant one to fix.
Another important point is cleanliness. Dust, hairs or tiny particles easily get trapped in wet glue. A dry cloth and a tidy space make a difference to the final result.
Drying, framing and hanging the puzzle on the wall
After gluing, respect the drying time without shortcuts. Avoid moving the puzzle, tilting it or testing it “just to see if it is ready.” Even when the surface feels dry to the touch, the inside of the joints may still be setting.
If you want a more polished finish, framing is the most solid solution. A frame protects the edges, reduces the risk of warping and really enhances the image. For large puzzles, it is best to use a firm backing board so the weight is evenly distributed.
There are several ways to fix the puzzle to the wall:
- traditional frame
- rigid base with strong mounting tape
- lightweight panel with adhesive hooks
- display mount with glass or acrylic
Without a frame, you need to be twice as careful. Ambient humidity, direct sunlight and small temperature changes can affect the cardboard over time. With a frame, these risks drop considerably.
If the puzzle has special sentimental or visual value, it pays to choose more stable display materials. Lightweight glass or an acrylic front helps protect the image from dust and makes the piece last longer.
Frequently asked questions about gluing a puzzle
A common question is whether the glue should be applied only on the front. The short answer is: it depends. For many decorative puzzles, gluing the front is perfectly enough. If the puzzle is large or heavy, or if it will be displayed without a frame, reinforcing the back is often a good decision.
Another frequent question concerns shine. Some glues leave a slightly glossy finish, while others dry more matte. This varies with the formula and the amount applied. A thin, well-spread layer tends to produce a more discreet and elegant result.
There is also the question of how long to wait before framing. The most prudent approach is to wait until the glue has fully cured. In many cases, one day is enough, but if the room is humid or cold, it may be wise to wait a few more hours.
Finally, some people ask whether it is worth taking a beautiful puzzle apart or preserving it. When the image has meaning, the work was demanding or the result suits the space, gluing it is an excellent way to make that achievement last and turn it into a visual feature with a real presence.