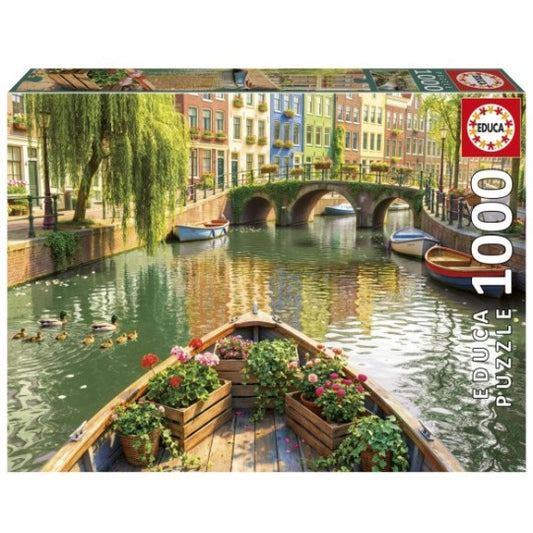
Turning a finished puzzle into a piece of wall art is one of the most rewarding ways to extend the pleasure of putting it together. What started as a tabletop challenge becomes part of your home, with texture, color and memories.
Framing a puzzle, however, takes more than choosing a pretty frame. There are technical decisions that make a difference to the final result: how you glue it, the type of backing board, the pressure of the frame, the front cover and even where the piece will be displayed. When these choices are made well, the puzzle stays flat, clean and visually striking for a long time.
Materials for framing a puzzle without damaging the image
Before you touch the puzzle, it is worth gathering all your materials. Working without interruptions reduces the risk of shifting pieces, dirtying the surface or putting unnecessary strain on the puzzle.
In many cases, the mistake is not the frame but the preparation. A good result usually depends on simple materials used in the right order.
- Puzzle glue: specially made to fix the pieces and create an even layer on the front
- Rigid backing board: foam board, thin MDF or acid-free pressed cardboard
- Spatula or plastic card: to spread the glue without leaving excess
- Tracing paper or non-stick paper: to protect your work table
- Metal ruler and craft knife: useful if the backing board needs trimming
- Frame with a sturdy back: deep enough to hold the puzzle, backing board and cover
If the puzzle has great sentimental value, or if the image is very detailed and dark, it pays to choose higher-quality materials. Glass or acrylic with good clarity and a stable backing board make the work look cleaner and more professional.
Preparing the puzzle before framing
The first step is making sure the puzzle is truly finished and well aligned. It sounds obvious, but small gaps between pieces become visible once the image hangs vertically. Gently run your hands over the surface and check that no pieces are raised, misaligned or upside down.
Then press the puzzle together with light movements, pushing the sections toward each other until the joints are tight. If it was assembled on a soft surface, such as a towel or corrugated cardboard, transfer it to a firmer base before going any further.
Cleaning the surface is also important. Dust, hairs and small particles get trapped under glue or glass and catch the eye as soon as the piece is hung. A soft brush or a dry microfiber cloth is usually enough.
If some pieces have an uneven sheen, the less you touch them, the better.
Methods for fixing the puzzle to the backing board
Not every puzzle needs to be glued the same way. Some people prefer to apply glue to the front, some opt for an adhesive sheet on the back, and others fix the puzzle to a rigid board without saturating the image. The choice depends on the size, where it will be displayed and the type of finish you want.
The following table helps you compare the most common solutions.
| Method | Advantages | Things to watch | Best for |
|---|---|---|---|
| Puzzle glue on the front | Bonds the pieces well and can give a glossy finish | Too much glue can mark the image | Decorative puzzles for the home |
| Adhesive sheet on the back | Keeps the front untouched | Requires precise application and a very flat base | Anyone who wants to avoid shine on the image |
| Diluted white glue | Budget-friendly option | Can warp if the amount is wrong | Casual projects and small puzzles |
| Mounting on a rigid board with spray adhesive | Good control and less moisture | Requires a ventilated space and even application | Medium and large puzzles |
Puzzle glue is usually the most practical option. It is designed to seep into the joints and hold the pieces together without soaking the cardboard too much. Spread it with a plastic spatula or the manufacturer's applicator, always in a thin layer. Ideally, cover the entire front evenly and let it dry completely before moving it.
If you prefer to keep the front free of any finish, fixing it from the back may be a better choice. In that case, the puzzle is very carefully flipped between two boards and then the chosen adhesive sheet or glue is applied. This method requires more control, but it better preserves the original look of the image.
Choosing a frame for the size and thickness of the puzzle
The right frame is not just there to "look pretty". It needs to accommodate the thickness of the puzzle, the backing board and the front cover without squeezing them too much. When there is not enough room, the puzzle can bow; when there is too much, the puzzle can move around inside.
Take the measurements after the puzzle has been mounted. If you only measure the loose image, there is a risk of error, because gluing and the backing board can slightly change the dimensions. With large puzzles, a few millimeters make a difference.
There is also an aesthetic decision: a discreet frame to highlight the image, or a bolder frame to give the whole piece more presence. Neither option is universal. It depends on the style of the room, the colors of the puzzle and the decorative effect you want.
- Thin, neutral frame
- Natural wood frame
- Black frame for high-contrast images
- White frame for light, airy spaces
- Mat board to give the image some breathing room
Glass, acrylic or no cover for your framed puzzle
The front cover changes the result quite a bit. Glass offers excellent clarity and protects against dust, but it is heavier and breaks on impact. Acrylic is light and safe, making it very practical for large puzzles or homes with children, although it can scratch more easily.
In some situations, the puzzle can be left without a front cover, especially if it already has a protective layer and hangs in a sheltered spot. Even so, without glass or acrylic the piece is more vulnerable to dust, moisture and wear along the edges.
If the frame will hang on a wall with lots of natural light, it is worth considering UV protection. The image will not be immune to time, but it will resist fading better.
Step by step: putting the puzzle in the frame
Once the glue is dry and the frame is ready, it is time to assemble everything. Work on a large, clean, well-lit table. The goal here is to keep the puzzle perfectly flat and avoid marks that go unnoticed during the process but become very obvious once the frame is closed.
The procedure is simple, as long as you don't rush it.
- Place the rigid backing board on the table and check that it is clean and straight.
- Position the glued puzzle on the board and line up the edges.
- Fix the puzzle to the board using your chosen method and let it dry completely.
- Wipe the visible side with a dry cloth and check that there are no loose particles.
- Open the frame and also clean the inside of the glass or acrylic.
- Insert the puzzle and board into the frame, adjusting carefully so you don't force the corners.
- Close the back, check the pressure and see whether the image sits level.
When placing the puzzle in the frame, avoid "pushing" it in from the sides. The right way is to lift it and set it down. This small difference reduces the risk of opening joints at the edges.
If you use a mat board, check beforehand that it does not cover important parts of the image. Some puzzles have a signature, date, caption or details around the edges that deserve to stay visible.
With a very large puzzle, it can help to have a second person lend a hand, just for the moment you transfer it into the frame.
Common mistakes when framing a puzzle
Many problems appear days after framing, when the glue has fully dried or the frame is already on the wall. Almost always, the cause lies in small decisions made at the start.
These are the most common mistakes:
- Too much glue: creates uneven shine, ripples or whitish marks
- Backing board too weak: lets the puzzle bend over time
- Frame not deep enough: presses on the image and can dislodge pieces
- Rushed measuring: leads to gaps or pressure along the edges
- Glass dirty on the inside: forces you to take everything apart afterwards
- Damp wall or direct sunlight: speeds up wear and warping
Another common mistake is trying to finish everything in one day. Between gluing, drying, mounting and framing, there are waiting times that must be respected. Haste is a bad partner for this kind of work.
How to keep your framed puzzle looking good for years
Once it is hanging, the puzzle still needs a little care. Avoid walls with condensation, busy kitchens and spots where direct sunlight hits for several hours a day. Heat and moisture affect the cardboard, the glue and even the finish of the frame.
Cleaning the outside should also be gentle. A soft cloth, dry or slightly damp, is enough for most situations. Harsh products can stain the frame, leave haze on acrylic or seep into the joints.
If the piece hangs in a hallway, stairwell or busy room, check from time to time that the wall fixing is still secure.
For large-format puzzles, it is best to use two hanging points instead of one. This distributes the weight better, prevents tilting and makes the whole piece more stable. It is a simple detail, but it greatly improves the visual result.
Framing a puzzle is, in the end, a way of giving permanence to hours of focus and patience. With good materials, a careful method and a keen eye for detail, the image no longer lives only on the table and takes its place in your home, safely and with personality.