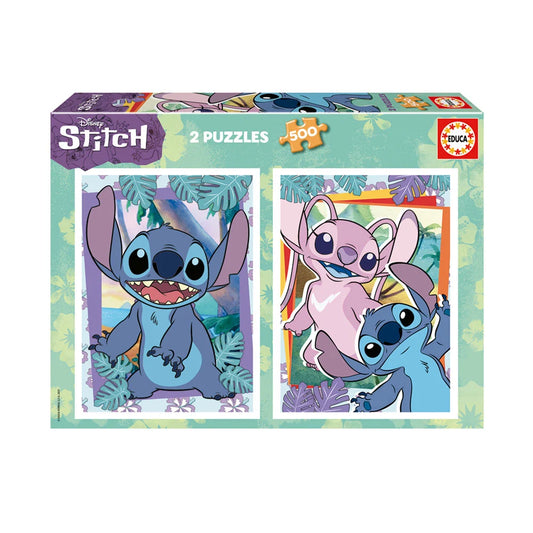
Some objects manage to bring people together, quiet the mind and, at the same time, awaken a playful side we so often let fall asleep. A 1000-piece puzzle with Stitch at the center of the image is one of those objects. It combines color, humor and a level of challenge that pushes you without going overboard. And when the last piece clicks into place, the satisfaction is unmistakable.
For Disney fans, for lovers of visual challenges, for anyone looking for a relaxing project at the end of the day, the theme makes sense. It is not just the charismatic figure of Stitch. It is everything around him: tropical backgrounds, shades of blue and lilac, star and flower patterns, gradients that call for attention and patience. And, of course, that feeling of constant progress, piece by piece.
What sets a 1000-piece puzzle apart
A 1000-piece puzzle is an interesting milestone in the hobby. It does not require a whole free weekend, but it does call for method and persistence.
- Typical size: approximately 68 x 48 cm, varying slightly by brand.
- Average time: between 8 and 15 hours, spread over days or weeks, depending on how difficult the artwork is.
- Space: a medium-sized table or a dedicated puzzle board, with room to sort groups of pieces.
- Visual complexity: enough to avoid monotony, with areas of uniform color that call for more careful techniques.
Compared with 500-piece puzzles, repeated patterns become more challenging. With 1500 or 2000-piece puzzles, the logistics get complicated. The 1000-piece ones sit at that sweet spot where you learn a lot and enjoy the process, without exhausting the patience of beginners.
The charm of Stitch in a puzzle
Stitch has the kind of palette that works wonders: saturated blues, violet shadows, big shiny eyes, well-defined outlines. This helps you create quick building “islands”, perfect for staying motivated. Around him, there are settings that break the uniformity: tropical leaves, beach postcards, a starry sky or textured patterns.
Beyond the visual side, there is the emotional side. Anyone who grew up with the film recognizes the features, the expressions and that mix of tenderness and chaos. A puzzle with this character does not stay in its box. It stays in the living room for a few days, sparks conversation and gets photographed. And once finished, it begs for a frame.
Materials, cut and finish: what to look for before buying
Not all 1000-piece puzzles are the same. Manufacturing details have a big impact on the experience:
- Cardboard: high density prevents warping and pieces giving way under light pressure.
- Cut: precision and a variety of shapes reduce false fits.
- Finish: an anti-glare matte finish makes working under bright lights easier; a glossy varnish makes colors pop but can cause glare.
- Print: crisp lines and stable colors, with no misregistration in the image.
- Cutting dust: the less, the better. A bag with too much dust can dirty the table and blur shades.
If you choose a puzzle to frame, go for stiffer cardboard and a matte finish. Both the gluing and the framing will turn out better.
A quick comparison of brands and features
Below is a summary table to help you choose based on practical aspects. The values are indicative and may vary by edition.
| Brand | Approximate size | Finish | Fit feel | Variety of shapes | Notes |
|---|---|---|---|---|---|
| Ravensburger | 70 x 50 cm | Anti-glare matte | Firm and clean | High | Stable colors, precise cuts |
| Clementoni | 69 x 50 cm | Semi-matte | Smooth and snug | Medium-high | Vibrant print, solid cardboard |
| Educa | 68 x 48 cm | Matte | Snug | Medium | Missing piece service, good value for money |
At Loja dos Puzzles you'll find licensed Stitch editions from Clementoni and Educa. If possible, check the specific image, whether it is a minimalist cover, a tropical scene or a collage of expressions.
Setting up your puzzle space
Building a 1000-piece puzzle calls for visual and physical comfort. Without it, the fun fades.
- Light: neutral white, coming from above and from the left (for right-handers) to reduce shadows.
- Surface: smooth, sturdy and roomy. A felt mat you can roll the puzzle up in helps if you do not have a dedicated table.
- Trays: boxes from another puzzle, kitchen trays or paper organizers are perfect for sorting by color and pattern.
- Posture: a firm chair, back supported, breaks every 45 minutes. Your neck will thank you.
If you share the table with your family, a portable puzzle board is a good idea. When the session ends, lift the board and the table is free.
Method: from the chaos of the box to the first complete island
The method is not rigid, but following a few steps makes progress smoother.
Edges first
Find all the pieces with a straight edge. Build the rectangle or the sections that already fit together. Having the border done creates context and cuts down on pointless attempts.Sort by color and texture
Separate the obvious groups: Stitch's skin and eyes, the sky background, leaves, lettering, shiny reflections. Even partial sorting speeds up assembly a lot.Themed islands
Start with elements that have strong outlines. Stitch's eyes and ears are usually a great starting point. Then add adjacent areas with similar shades.Shape tactics
When color does not help, study the piece profiles: “two knobs and two holes”, “one narrow hole”, “long neck”. In areas of sky or water, shape rules.Rotate often
Turn the piece without fear. Sometimes 90 degrees makes all the difference, and the color suddenly lines up with the direction of the image's grain.The three-try rule
If a piece does not fit after three attempts in plausible spots, it goes back to the tray. This stops you from being stubborn and wearing down the corners.Smart breaks
Stop when everything starts to look the same. When you come back, your mind will notice transitions and nuances it missed before.
Some people like to build from the center. With Stitch, this works well, because the main character offers strong clues. If you go that way, keep your islands movable by building them on tracing paper or acetate sheets so you can shift them later.
Tricks for difficult areas
Certain areas test your patience: a starry sky, almost identical blue shadows, soft gradients. Here are some strategies that help:
- See the image as blocks of brightness, not just color. The transition from light to dark shows up better under side lighting.
- Use the back of the pieces: the cardboard pattern may differ in small marks or in the direction of the fibers.
- Create micro-series by shape: line up 10 to 15 pieces with the same type of connector and test them one after another in the likely spot.
- Work from the outside in on these areas, attaching to sections already built and expanding outward from there.
Small progress adds up. Ten pieces in half an hour in a tough area are worth their weight in gold.
How to manage time and motivation
Realistic goals make the process more enjoyable:
- Build the border in one session.
- Complete the main Stitch figure in another.
- Set aside blocks of 30 to 45 minutes, two or three times a week.
Some people like to time themselves to compare with friends. Others prefer not to measure anything. What matters is keeping it light. Background music helps, and so do podcasts. On tiring days, focus on the “easy” sections to get that quick win.
Approximate build time for a 1000-piece Stitch puzzle:
- Dedicated beginners: 12 to 18 hours
- Intermediate puzzlers: 8 to 12 hours
- Advanced puzzlers: 6 to 9 hours
Do not turn it into a race. The idea is to keep enjoying the details.
Solo or as a team
Building solo gives you that bubble of concentration. As a team, the energy changes, with conversations and laughter when someone finds “the impossible piece”.
Good practices for group sessions:
- Assign zones by tray: Stitch's eyes and ears for one person, the background for another, the vegetation for a third.
- Rotate zones every 20 minutes to avoid burnout.
- Etiquette rule: no forcing pieces. Whoever damages one is in charge of finding a replacement.
Small groups of two or three work best. It avoids arms crossing over each other and keeps things flowing.
Photographing your progress and sharing it
Documenting your progress adds an artistic side to the experience. Photos from a high angle, natural light early in the morning, close-ups of the most beautiful fits. A time-lapse, if you have a tripod, captures what your eye feels: the picture taking shape.
When you share, include details that interest other fans: time per session, the most challenging areas, the brand and the finish. It becomes a conversation between enthusiasts.
Gluing and framing
If the image deserves a place on the wall, it is worth doing everything carefully so it lasts.
- Choice of glue: made for puzzles, water-based, clear when dry.
- Table protection: a plastic sheet or silicone paper underneath.
- Application: thin layers, from the center outward, with a flat spatula. Two light coats are usually enough.
- Drying: 8 to 12 hours without touching it, with good ventilation and no direct sunlight.
Framing:
- Size: many standard 70 x 50 cm frames fit most 1000-piece puzzles, with a mat.
- Backing: rigid acid-free board, to prevent stains over the years.
- Glazing: anti-glare acrylic is light and protects against UV. If you prefer no glazing, accept careful cleaning from time to time.
Another option is not to glue it: use corner mounts and press the puzzle between the backing and the mat. This lets you take it apart in the future and store your work.
Storage and care
If you are not going to frame it, looking after the puzzle ensures it lasts.
- Seal the bag: close it with a zip and, if possible, use two bags for double protection.
- Silica: a small sachet prevents moisture.
- Upright box: store it like a book to reduce warping.
- Collection log: a small card with the build date, difficulty notes and a photo of the finished puzzle.
Swapping with friends also keeps puzzles circulating, frees up space and extends the life of the pieces.
Sustainability in the hobby
Some simple choices make a difference:
- Recycled cardboard and forest certification on the box.
- Water-based inks, with no strong smell.
- A reusable mat instead of disposable surfaces.
- Sharing and donating after building, strengthening the local community.
Some publishers are investing in more compact packaging, reducing the air shipped in transport. Whenever possible, choose those editions.
Frequently asked questions, quick format
Is it suitable for children?
Children over 10 to 12, with patience and guidance, can take part very well, especially in the Stitch sections. Splitting it into goals keeps them interested.What should I do if a piece is missing?
Check the bag, the box, under the table and around the trays. If it does not turn up, many brands have replacement services. Note down the puzzle code and the affected area.Can it be finished in one day?
With experience and free time, yes. But spreading it over 3 or 4 sessions is usually more enjoyable and avoids fatigue.How much space do I need?
A clear surface of at least 90 x 60 cm, plus side trays.Does glare get in the way?
Under direct light, yes. If you work under powerful ceiling lights, a matte finish is usually more comfortable.
Advanced tips for those who want to go further
- Color patterns: create a small scale of blues, from lightest to darkest, and line up pieces along that gradient. It helps with sky and sea backgrounds.
- Brushstrokes: many Stitch artworks have painted textures. Spotting the direction of the brush leads you to orient pieces correctly.
- Photographic edges: if the image has a vignette (darkened edges), work from the outside in, following the gradient.
- Visual checkpoint: leave one corner of the puzzle 100 percent solved at the end of each session. When you return, that corner serves as an anchor.
This focus on detail turns difficult areas into small victories.
The perfect gift for fans and collectors
A 1000-piece Stitch puzzle works for many occasions:
- Birthdays for anyone who loves Disney, illustration or creative projects.
- Family vacations, for quiet evenings.
- Rainy weekends, with tea and good music.
- Unwinding after intense periods at work.
If you want to put together a gift set, include:
- A felt roll-up mat
- Sorting trays
- Puzzle glue and a spatula
- A 70 x 50 cm frame with a mat
The gesture becomes more than a gift. It is an invitation to create quality time.
Where to buy and how to choose the artwork
At Loja dos Puzzles you'll find several 1000-piece options: the Clementoni Stitch puzzle, the Clementoni Disney Stitch Panorama puzzle and the Educa Lilo & Stitch puzzle, all in the Stitch puzzle collection. Compare the covers: some editions feature a close-up of Stitch on a solid background, others go for a fuller composition with scenery details.
When choosing the artwork, think about where it will end up. If you picture the puzzle on your bedroom or office wall, choose a color scheme that works with the space. Cool tones go well with minimalist decor; tropical compositions pair nicely with bohemian interiors and light wood.
A hobby that trains your eye
Building puzzles sharpens skills that spill over into everyday life:
- Fine observation: noticing subtle variations in color and texture.
- Planning: breaking a big problem into manageable steps.
- Active patience: persisting with method, not force.
And then there is that moment. One piece is missing to complete one of Stitch's eyes. You search, rotate, try. Suddenly, it fits. It is a small thing, but it feels great.
The combination of beauty and challenge in a 1000-piece puzzle featuring this character creates an experience that is both comforting and stimulating. In the end, the finished image is not just an object. It is the sum of hours spent with calm, attention and a smile that comes back every time you walk past it.